21. Finished Platformer

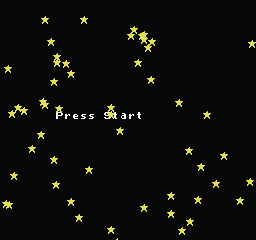
First thing I added was a title screen. To be honest, I made this as quickly as possible, just to show the proof of concept. I made it in NES Screen Tool, and exported the background as a compressed RLE .h file “title.h”. So the title mode waits for the user to press start, and cycles the color a bit to be a little less boring.

26_full_game1

temp1 = get_frame_count();
temp1 = (temp1 >> 3) & 3;
pal_col(3,title_color_rotate[temp1]);

title_color_rotate is an array of 4 possible colors. >> 3 is divide by 8, so it will change colors every 8th frame. The & 3 keeps the value in the 0-3 range. That would be similar to modulus 4 (% 4), but much much faster code.

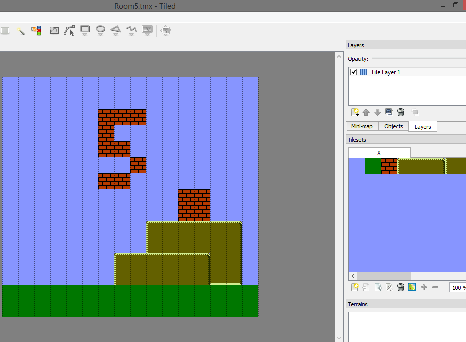
Now, I didn’t like making 1 room at a time, so I made it so you could have 1 long Tiled file, and export it to csv, and convert it to arrays with CSV2C_BIG.py.

26_Tiled

(I had it auto generate an array of pointers at the bottom, but I didn’t end up using those, so I delete them, and instead made 1 larger array of pointers, with all levels in it).

const unsigned char * const Levels_list[]={
Level1_0,Level1_1,Level1_2,Level1_3,Level1_4,Level1_5,Level1_6,Level1_7,
Level2_0,Level2_1,Level2_2,Level2_3,Level2_4,Level2_5,Level2_6,Level2_7,
Level3_0,Level3_1,Level3_2,Level3_3,Level3_4,Level3_5,Level3_6,Level3_7
};

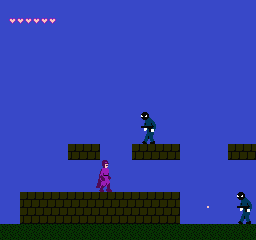
I am using 2 kinds of enemies and 2 kinds of coins.

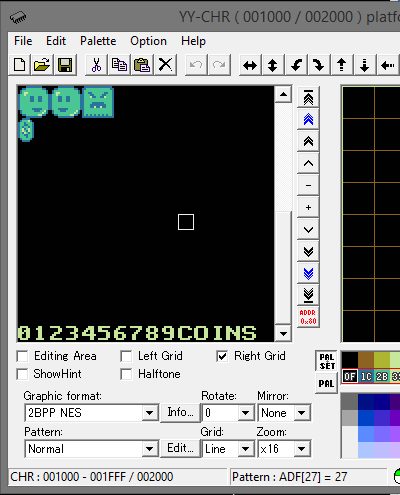
And then, I made a picture with all the Sprite objects on it (with transparency for background), and imported that as a separate tileset in Tiled, and added another layer, where the Sprite objects are placed. I placed the enemies on that 2nd layer (as tiles), and exported another csv file. Then I wrote another .py file “CSV2C_SP.py” to convert those into arrays.

26_Tiled2

Well, I didn’t end up using it exactly like this. It mixes the coins and the enemies, and I want them in separate arrays. So, I cut and pasted the different kinds of objects into 2 different arrays. But the .py file is helpful, and definitely sped this up.

These arrays might need to be edited slightly, like if we need coins at a different X offset from the tile grid.

Again, I made 2 kinds of enemies. The chasers now collide with walls. I was going to use the same code that the hero used, but decided it was too slow to check many objects this way, so I wrote a much simpler one.

bg_collision_fast(). This only checks 2 points instead of 4.

The chaser code isn’t very smart, they only move X and never change Y. If you put them on a platform, they would float right off it like a ghost. Maybe in the future I will edit this with improved enemy move logic, so he won’t float off a platform, but rather change directions, or fall, or something.

The other enemy is the bouncer. He just bounces up and down. He checks the floor below when falling, to stop exactly at the floor point, reusing the same code from the hero checking the floor.

bg_coll_D();

The second kind of coin is just an end-of-level marker. I suppose we could have added some cool sound fx for reaching the end of the level, or an animation. That would have been nice. Currently, it just fades to black in the switch mode.

Oh, yeah. I added more modes. More game states. title, game, pause, end, switch (transition from one level to another). These are fairly obvious as how they work.

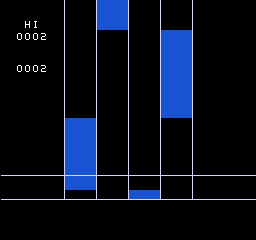
Debugging wasn’t too bad. Mostly I was worried about running past the frame and getting slowdown. I was testing code by placing gray_line() around functions. This helped me speed up things. I combined some of the enemy steps to speed them up. And I would put a gray_line() at the end of the game logic to see how far down on the screen we were. Here’s one of the tests, back when I thought I was going to use sprite zero hit and a HUD above.

full_game_debug

We don’t want to make our enemy logic too much more complex, nor put too many objects on the same screen, or we might get slow down, so we need to test as we go, and see how many enemies we can fit on a screen before it crawls to a halt. I think we can handle 7 or 8. That’s more than I need, so we’re still ok.

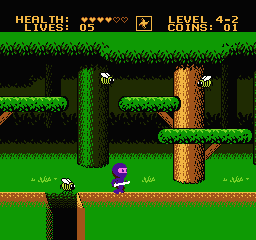
And finally, I put the # of coins as sprites in the top left. I didn’t put it too high up, where it might get cut off on some old TVs. 16 pixels down is fine.

Oh, almost forgot. The sprite shuffing code. Remember from the Sprite page, I mentioned that you can only have 8 sprites per horizontal line? Well, since that is a possibility, we must add some kind of shuffling to the position of each object inside the OAM buffer, so that we don’t have an enemy disappear entirely.

The simplest way to do this would be to change the starting position each frame. oam_set(rand8() * 4);  or something like that. It wouldn’t be very good, though.

I decided to go through the list of enemies in a different order each frame. This version has a limit of 16 sprite objects at a time. If you had more, then you would have to use a different shuffling algorithm.

const unsigned char shuffle_array[]={
0,1,2,3,4,5,6,7,8,9,10,11,12,13,14,15,
15,14,13,12,11,10,9,8,7,6,5,4,3,2,1,0,
0,2,4,6,8,10,12,14,1,3,5,7,9,11,13,15,
15,13,11,9,7,5,3,1,14,12,10,8,6,4,2,0
};

So, the first pass, it goes forward 0-15. The second pass it goes in reverse. The 3rd pass it does even then odds. The 4th pass, reverse that. Note, I’m not shuffling coins, so I have to make sure there aren’t too many coins on the same horizontal line.

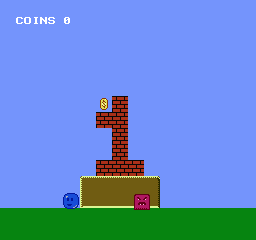
And here’s our working game, with 3 levels, 8 rooms each. This could have been expanded a bit. It takes about 2000 bytes per level. We have about 16000 bytes left, so we could have added 7-8 more levels… so maybe 10 levels total. If we needed more than that, we would need to think about a different mapper, or maybe some kind of compression.

.

Update 2023

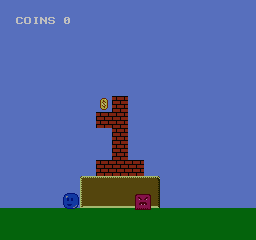
I rewrote the collision code and made some other small changes. One thing, I made the graphics look a little nicer. This is what it looks like now, with just a little more effort. Oh, and if you die (or win) you can now press START (after a short pause) to restart the game (so you don’t have to press RESET). I just had to add another game mode, for it to wait a few seconds and then read for the START button.

screenshot26

.

https://github.com/nesdoug/26_Full_Game/blob/master/full_game.c

https://github.com/nesdoug/26_Full_Game

And, that’s all. Go make some games.

Downloads, free games

All the .nes files from this tutorial

https://github.com/nesdoug/27_NES_FILES


Purple Cape Man, Vigilante Ninja

http://dl.dropboxusercontent.com/s/0hnvrxix0kkoz5e/VIGD.NES

VIGD2

.

Vigilante Ninja 2

Full Game! Revised.

(hold A+B+Select on option menu for “gameboy mode”)

http://dl.dropboxusercontent.com/s/13w29q1azmyafni/Vig2-Full-revA.nes

Old Demo

http://dl.dropboxusercontent.com/s/2ipv0bgxllf1z55/Vig2-DEMO.nes

Click to access VigNinjaManual4.pdf

vig2_lv4-1

.

Spacy Shooty (the example code from the old tutorial)

http://dl.dropboxusercontent.com/s/4em2jpto45ds9tr/SPACY4.nes

spacy4

.

Talk NES (speech synthesizer)

http://dl.dropboxusercontent.com/s/58d3igz64p5x7md/TalkNES4.zip

talkNES3M

.

Flappy Jack

http://dl.dropboxusercontent.com/s/k3tpdfr5rj11e7s/flappy14.nes

flappy14

.

Rock Paper Scissors (Lizard Sbock)

http://dl.dropboxusercontent.com/s/fnv35n959f58dvq/Rock9b.nes

Rock9b

.

Jammin Honey

http://dl.dropboxusercontent.com/s/3gkv6onxfxypt53/JamminHoney.nes

JamminHoneyGame

.

Euchre (for 2018 nesdev competition)

Updated link 2020. New music by thecoolestnerdguy.

http://dl.dropboxusercontent.com/s/qxjjukfb9owhoq1/Euchre5.nes

Euchre-0

.

Falling Tiles (for 2019 nesdev competition)

http://dl.dropboxusercontent.com/s/10gc5nwbhcrdf5o/FallingTiles.nes

A game for the zapper gun.

FallingTiles2

.

(note, only Jammin Honey, Euchre, and Falling Tiles were written in C).


Appendix, nesdoug library

//Doug Fraker 2018

void set_vram_buffer(void);
// sets the vram update to point to the vram_buffer. VRAM_BUF defined in crt0.s
// this can be undone by set_vram_update(NULL)

void __fastcall__ one_vram_buffer(unsigned char data, int ppu_address);
// to push a single byte write to the vram_buffer

void __fastcall__ multi_vram_buffer_horz(const char * data, unsigned char len, int ppu_address);
// to push multiple writes as one sequential horizontal write to the vram_buffer

void __fastcall__ multi_vram_buffer_vert(const char * data, unsigned char len, int ppu_address);
// to push multiple writes as one sequential vertical write to the vram_buffer

void clear_vram_buffer(void);
// resets the vram buffer, if you need to undo something, like for a scene change

unsigned char __fastcall__ get_pad_new(unsigned char pad);
// pad 0 or 1, use AFTER pad_poll() to get the trigger / new button presses
// more efficient than pad_trigger, which runs the entire pad_poll code again

unsigned char __fastcall__ get_frame_count(void);
// use this internal value to time events, this ticks up every frame

void __fastcall__ set_music_speed(unsigned char tempo);
// this will alter the tempo of music, range 1-12 are reasonable, low is faster
// default is 6
// music_play also sets the tempo, and any Fxx effect in the song will too
// you will probably have to repeatedly set_music_speed() every frame
// music_stop() and music_pause() also overwrite this value

unsigned char __fastcall__ check_collision(void * object1, void * object2);
// expects an object (struct) where the first 4 bytes are X, Y, width, height
// you will probably have to pass the address of the object like &object
// the struct can be bigger than 4 bytes, as long as the first 4 bytes are X, Y, width, height

void __fastcall__ pal_fade_to(unsigned char from, unsigned char to);
// adapted from Shiru’s “Chase” game code
// values must be 0-8, 0 = all black, 8 = all white, 4 = normal

void __fastcall__ set_scroll_x(unsigned int x);
// x can be in the range 0-0x1ff, but any value would be fine, it discards higher bits

void __fastcall__ set_scroll_y(unsigned int y);
// y can be in the range 0-0x1ff, but any value would be fine, it discards higher bits
// NOTE – different system than neslib (which needs y in range 0-0x1df)
// the advantage here, is you can set Y scroll to 0xff (-1) to shift the screen down 1,
// which aligns it with sprites, which are shifted down 1 pixel

int __fastcall__ add_scroll_y(unsigned char add, unsigned int scroll);
// add a value to y scroll, keep the low byte in the 0-0xef range
// returns y scroll, which will have to be passed to set_scroll_y

int __fastcall__ sub_scroll_y(unsigned char sub, unsigned int scroll);
// subtract a value from y scroll, keep the low byte in the 0-0xef range
// returns y scroll, which will have to be passed to set_scroll_y

int __fastcall__ get_ppu_addr(char nt, char x, char y);
// gets a ppu address from x and y coordinates (in pixels)
// x is screen pixels 0-255, y is screen pixels 0-239, nt is nametable 0-3

int __fastcall__ get_at_addr(char nt, char x, char y);
// gets a ppu address in the attribute table from x and y coordinates (in pixels)
// x is screen pixels 0-255, y is screen pixels 0-239, nt is nametable 0-3
// the next 4 functions are for my metatile system, as described in my tutorial
// nesdoug.com

void __fastcall__ set_data_pointer(const char * data);
// for the metatile system, pass it the addresses of the room data
// room data should be exactly 240 bytes (16×15)
// each byte represents a 16×16 px block of the screen

void __fastcall__ set_mt_pointer(const char * metatiles);
// for the metatile system, pass it the addresses of the metatile data
// a metatile is a 16×16 px block
// metatiles is variable length, 5 bytes per metatile…
// TopL, TopR, BottomL, BottomR, then 1 byte of palette 0-3
// max metatiles = 51 (because 51 x 5 = 255)

void __fastcall__ buffer_1_mt(int ppu_address, char metatile);
// will push 1 metatile and 0 attribute bytes to the vram_buffer
// make sure to set_vram_buffer(), and clear_vram_buffer(),
// and set_mt_pointer()
// “metatile” should be 0-50, like the metatile data

void __fastcall__ buffer_4_mt(int ppu_address, char index);
// will push 4 metatiles (2×2 box) and 1 attribute byte to the vram_buffer
// this affects a 32×32 px area of the screen, and pushes 17 bytes to the vram_buffer.
// make sure to set_vram_buffer(), and clear_vram_buffer(),
// set_data_pointer(), and set_mt_pointer()
// “index” is which starting byte in the room data, to convert to tiles.
// use index = (y & 0xf0) + (x >> 4); where x 0-255 and y 0-239;
// index should be 0-239, like the room data it represents

void flush_vram_update2(void);
// same as flush_vram_update, but assumes that a pointer to the vram has been set already
// this is for when the screen is OFF, but you still want to write to the PPU
// with the vram_buffer system

void __fastcall__ color_emphasis(char color);
// change the PPU’s color emphasis bits

#define COL_EMP_BLUE 0x80
#define COL_EMP_GREEN 0x40
#define COL_EMP_RED 0x20
#define COL_EMP_NORMAL 0x00
#define COL_EMP_DARK 0xe0

void __fastcall__ xy_split(unsigned int x, unsigned int y);
// a version of split that actually changes the y scroll midscreen
// requires a sprite zero hit, or will crash

void gray_line(void);
// For debugging. Insert at the end of the game loop, to see how much frame is left.
// Will print a gray line on the screen. Distance to the bottom = how much is left.
// No line, possibly means that you are in v-blank.

#define high_byte(a) *((unsigned char*)&a+1)
#define low_byte(a) *((unsigned char*)&a)
// for getting or modifying just 1 byte of an int

#define POKE(addr,val) (*(unsigned char*) (addr) = (val))
#define PEEK(addr) (*(unsigned char*) (addr))
// examples
// POKE(0xD800, 0x12); // stores 0x12 at address 0xd800, useful for hardware registers
// B = PEEK(0xD800); // read a value from address 0xd800, into B, which should be a char

void seed_rng(void);
// get from the frame count. You can use a button (start on title screen) to trigger

20. Platformer Again

I decided not to use a split screen. I was really nervous that we were going to get slowdown once we added enemies and coins, which would (with my setup) make the screen wildly go back and forth, and look terrible.

I left the split screen out, and we don’t need to worry about slowdown (having more game logic than can fit in a frame).

Now that we put the music and sound fx in, let’s add some enemies and coins to our platformer. We can use our coin sfx for collision with coins, and noise sfx for collision with enemies.

I drew some simple enemies in yy chr, and made some metasprite definitions. I could have used NES Screen Tool, but since these are fairly simple, I just cut and pasted and edited the tile # from another similar metasprite.

25_YY

It would have been nice to use an array of structs to define everything, but the 6502 is too slow. The faster way is to use a lot of char arrays, all smaller than 256 bytes, like this.

#define MAX_COINS 16
unsigned char coin_x[MAX_COINS];
unsigned char coin_y[MAX_COINS];
unsigned char coin_active[MAX_COINS];
unsigned char coin_room[MAX_COINS];
unsigned char coin_actual_x[MAX_COINS];

I even sped up the object initial code, to point out how you can make faster code by only putting 1 array per line of code. The 6502 processor only can do 1 pointer at a time, so the compiler shoves the other one in the c stack, and then does a whole dance around it, 5 times slower.

So instead of…

coin_y[index] = pointer[index2];

I did this…

temp1 = pointer[index2]; // get a byte of data
coin_y[index] = temp1;

Believe it or not, this compiles to faster code. We have to think about speed optimization, if we want a scrolling game with multiple moving objects. (And no slow down).

So, every frame, I check to see if each object is in range (on screen), and mark them “active”. I only move them if active, I only check collision if active, and I only draw them to screen if active.

check_spr_objects() checks each object to see if they are on screen, and marks them active, if true.

Right now the movement code is terribly simple. The chasers just see if the hero X is greater than theirs, and heads toward the hero. I will try to make this a little better next time.

Currently, I am using y=0xff as “doesn’t exist” (TURN_OFF). So, turning off an enemy is handled by putting their Y to 0xff. this could be handled differently, but that’s what I chose. It works as long as we don’t need enemies jumping in from below the screen.

One more thing I started to do, was add game states. I added Pause mode, which changes the song, and nothing moves, but I am darkening the screen by setting the color emphasis bits. This was something built into the NES PPU. Flipping a color emphasis will emphasize a color by darkening the other colors. The red bit will darken blue and green. If you set them all, it darkens all the color, just a little bit.

color_emphasis(COL_EMP_NORMAL);

25_platformer5

color_emphasis(COL_EMP_DARK);

25_platformer5b

https://github.com/nesdoug/25_Platform5/blob/master/platformer5.c

https://github.com/nesdoug/25_Platform5

Now that we have the it basically working, we will make some real levels. Next time… Sorry the link below doesn’t go to the next page, try this link…

https://nesdoug.com/2018/09/11/21-finished-platformer/


19. More things

Now, for something completely different.

Random numbers.

The NES has no good way to generate random numbers.

neslib has rand8() and rand16() functions, but it doesn’t have a good way to seed it. It just uses a constant at startup, meaning that the random numbers will always be exactly the same at reset.

So I wrote a function that puts the frame count into the seed. So, you could put this on a title screen. seed_rng()

This just pushes the frame counter (an internal value) to the random seed. So it isn’t random at startup either, which is why you should wait for user input to randomly trigger it, like “PRESS START” on the title screen.

Here’s an example.

23_Random

https://github.com/nesdoug/23_Random/blob/master/Random.c

https://github.com/nesdoug/23_Random

Note: rand8() is not very good. It repeats itself in a determinate loop of 255 numbers, regardless of the seed. Changing the seed only changes the starting position of that loop. If you truly need random numbers you should use the standard C function rand() and srand() to seed that. If you are using a recent cc65 version (2016 or later), it will produce a much better set of random numbers than rand8. If you use that, you will need to…

#include <stdlib.h>

.

Mappers

So far we’ve been using the most basic mapper, NROM. This is defined in the ines header in crt0.s, in the “HEADER” segment. That is actually importing a linker symbol from the .cfg file, and was zero. NROM is mapper zero. So, to change the mapper number, we change the .cfg file, at the bottom. NES_MAPPER, value = #.

Why change the mapper? Well, if we wanted more PRG space or more CHR, or more RAM, we would need a special cartridge that had those features.

It does that by taking the much larger ROM, and remapping a small piece of it to the CPU address $8000 (for example).

For C programming, it would be especially difficult to use most of the mappers. One function might expect another to exist and jump to it, except it’s not mapped into place…crashing the game.

Possibly, you could put data (not code) into several small chunks, and swap those into place as the game progresses. Another thing you could do is put the music data into alternate banks, and only put them in place when needed.

This is an advanced topic, and I won’t cover it as much as I should. Let’s discuss a few of the more common ones.

CNROM, allows you to change the entire graphics, between 4 options. (see examples below)

AxROM and UxROM have no CHR ROM. The graphics are in the (large) PRG ROM, and need to be loaded to the CHR RAM to be used. AxROM allows you to change the entire $8000-ffff banks where UNROM has $c000-ffff fixed, and allows you to change the $8000-bfff bank. I would prefer UNROM to AxROM, since you could put your C code in the fixed bank and swap data in and out. It would be very difficult to program a AxROM game in C, some ASM will be necessary.

AxROM is fixed mirroring to 1 nametable, but you could use the variation BNROM (Deadly Towers) which isn’t. Because the entire PRG ROM is changed, even the reset vectors, you need to have a reset vector in every set of banks, which should redirect you to the starting bank, if the user presses the RESET button.

In fact, never assume the startup state. The init code should explicitly put the correct initial banks in place before use. The user could press reset while the wrong bank is in place, for instance.

There is a homebrew version on UNROM, mapper 30, UNROM 256, which is much larger than any commercial game. NESmaker uses it. This might be useful for C programming.

Mojon Twins made at least 1 game in C with standard UNROM… you might be able to find example code somewhere on their repository.

For any mapper, you COULD specify that it has RAM at $6000-7fff, in the header. byte 10, bit 4. If you just start writing (reading) to this area, most emulators will assume a PRG RAM chip exists. But, if you want it battery backed (save RAM), you need to indicate it in the header, byte 6, bit 1.

GNROM, mapper 66 (or Wisdom Tree / Color Dreams, mapper 11) can swap the entire PRG and the entire CHR. Of course this presents the same problems as AxROM, getting one bank to call a function in another bank, and making sure the CRT library is available all the time.

.

More advanced mappers, like MMC1.

cppchriscpp uses MMC1 (SxROM) in his C project.

https://github.com/cppchriscpp/nes-starter-kit

some of the bank switching code…

https://github.com/cppchriscpp/nes-starter-kit/tree/master/source/library

You can change the $8000-bfff areas. and you can change either tileset (ppu 0-fff or ppu 1000-1fff). and you can change mirroring from H to V. This is one of the most popular mappers.

And a bit more advanced, MMC3 (TxROM). You can change $8000-9fff, and/or $a000-bfff banks. You can change a smaller area of CHR ROM, as small as $800 sized, for animated backgrounds (waterfalls, etc). And you can use the scanline counter IRQ to do multiple background splits. However, the IRQ code needs to be written in ASM.

I made a simple CNROM example. There are 4 CHR files, and I’m simply swapping between them, and changing the palette.

CNROM has a technical problem, called bus conflicts. The mapper works by writing to the ROM, which if course you can’t do. If the byte at the ROM is different from the byte written, it might not work… so I made a const array, with values 0-3, and I’m simply writing the same value to the ROM value. I know technically, you’re not supposed to write to a const, but with a little trickery, it is easy. I’m using this POKE() macro:

POKE(address, value);

Which casts the address to a char * and then stores the value there.

Press start, the CHR changes (and the palette). It is entirely the POKE() statement that changes the CHR banks.

The corners are missing from the picture, because, I needed a blank tile for the rest of the BG, and the RLE compression required that I have 1 unused tile.

24_mappers

https://github.com/nesdoug/24_Mappers/blob/master/mappers.c

https://github.com/nesdoug/24_Mappers

.

.

Further reading on mappers…

https://www.nesdev.org/wiki/Mapper

.

.

18. Sprite Zero

This one is a bit hard to explain. But SMB used it, so most people consider it a standard game element. When you have the top of the screen not scrolling, but the bottom of the screen scrolling, it’s probably a sprite zero screen split.

The sprite zero, is just the first Sprite in the OAM… addresses 0-3. The PPU marks a flag  (register $2002) the first time it sees the a non-transparent pixel of the zero sprite over a non-transparent pixel of the BG. We can look for this flag, and use it to time a mid-screen event, like changing the X scroll.

Waiting for this flag is wasted CPU time. It would be better to use a mapper generated IRQ, like MMC3 / MMC5 scanline counter or Konami VRC 2,4, or 6 scanline counter. Better, because the cartridge would count for you, and you don’t need to poll 2002 repeatedly for changes, and you can do multiple splits per frame.

But, I decided not to cover IRQs in this tutorial. You would need to learn ASM to use those, since IRQ code needs to be written in ASM.

Anyway. once it hits, you know the PPU is on a specific line on the screen, and you can change the scroll position.

Just writing to 2005 twice midscreen can only change the X scroll. This is just how the NES PPU works. You just can’t change the Y scroll by writing to the scroll register mid frame. But, you can change the X scroll. So, I changed the split function to only take 1 argument, X, to better reflect this limitation.

I want the top left screen to be the HUD, so we keep the regular scroll stuck at 0,0. When I set the regular set_scroll_x(0) and set_scroll_y(0), I just keep them at zero.

Then, first thing we do on each frame is poll for Sprite zero right away. We don’t want to miss it! It would crash the game. Send it the actual X. It will adjust the scroll mid screen.

split(scroll_x);

We had to adjust the screen drawing code not to overwrite the top of the screen. Now we have a stable HUD that we can draw our stats to.

Note that the actual sprite is hidden there on the top right (behind one of the letters of the HUD). You can see it if you press the SELECT button. It will replace the sprite with a white box so you can see where it is.

We need to make sure that the sprite is always there (in OAM), before the first visible frame, so that it won’t go looking for it and never find it on screen (which could crash the game).

21_sprite_zero

https://github.com/nesdoug/21_Sprite_Zero/blob/master/sprite_zero.c

https://github.com/nesdoug/21_Sprite_Zero

.

And, just to contradict myself, we actually can change the Y scroll midscreen with a complicated 2006 2005 2005 2006 trick. I’m doing this last (the bottom of the screen), and it’s more dangerous, because running past the end of the frame before running this function, and the whole game could crash, if it never finds the Sprite zero hit.

But, I wanted to show that it was possible, even if you should never use it. Perhaps for someone braver than me. Perhaps for the top of the screen in a vertically scrolling game.

Anyway, I made this function…

xy_split(x,y);

I had to make some changes to the platformer, since the entire screen is now aligned higher, so I had to adjust the y values of bg collisions. this is probably not the ideal setup, but I just wanted to demonstrate it. I’m putting the top of the screen at the bottom of the screen.

Here’s the example. I guess I should have used the vertical scrolling code to show this better. This could have been done with the regular split code.

22_xy_split

https://github.com/nesdoug/22_XY_Split/blob/master/xy_split.c

https://github.com/nesdoug/22_XY_Split

.

And I was so worried about slowdown causing scrolling errors in the game, that I didn’t end up using the sprite zero hit in the final game, coming up later. These examples work fine, because there is not much game logic, but as soon as we add a few enemies and move them around and have to check collisions, the logic goes longer than 1 frame, and slowdown causes scolling errors on every 2nd frame.

It should be noted that Mojon Twins (na_th_an) uses this same sprite zero split in many of his games, and told me just refactor if scrolling problems happen. Split long tasks into 2 different frames. Check only half the collisions a frame, for example.

17. DPCM sound

This one is a bit tricky. DMC files are huge. You might want to avoid them altogether. Most games don’t use them.

However, you might want to put in a sound effect that sounds like a real thing, a voice saying one word “fight”, or a dog barking, or maybe some more realistic drums, or cool bass line.

Try to keep them very short, like 0.2 seconds. You can / should edit them down with a sound editor like Audacity. I’m using some royalty free samples.

The faster the frequency of the DMC sample, the more bytes of ROM it uses. Faster is higher quality… below rate A, the sound quality is terrible. Maybe split the difference and use C or D. I actually used rate F for mine, but I might have lowered that if I ran out of ROM space.

Famitracker can import the sample, and map them to a note. With famitone2, you must put the samples on instrument zero, and use note range C-1..D-6. Also, the instrument zero must have a volume sequence, even if you don’t use it (just a quirk of famitone2). That’s under 2a03 setting, instrument settings. Put a check mark next to volume (this is true for all instruments).

19_FT2

Even if you only want to use the sample as a stand alone sound effect, and not in the song, it must be included in the song like this.

Now, when you export the text it will have the dmc file defined. and when you use text2data it will output a dmc file. Include that in crt0.s in a “dmc” or “sample” or whatever, segment. I called it “SAMPLES”.

This is the tricky part. DMC samples must go between $c000 and $ffc0. preferably as far to the end as possible. Subtract the byte size of the samples from ffc0 and round down to the next xx40. In the cfg file, define the SAMPLE segment to start there.

Now, also, go to the top of crt0.s and define FT_DPCM_OFF to start at the same value.

The .dmc file is 5,248 bytes long. That’s rather large for a NES game. It will be ok for a simple example code, though.

Now, if the samples are in the music, they should play with the music.

But, if you wanted them to be sound effects, you have to call them in your code, like

sample_play(sample#)

How do we know what the sample number is? It depends on what note you mapped them to in your famitracker file. If you look at the output file from text2data (mine is “DMCmusic.s”), you see a samples area. You can tell by the non-zero lengths at the right side, that our samples are at 25, 27, 29, 30 and 32. It counts up from C1, so if we had mapped it to C1, it would be sample_play(1). But the sample I want is at G3, so we need sample_play(32).

I put this with a new jump. It’s just my voice, saying “jump”, to be silly. 🙂

Hope this makes sense.

https://github.com/nesdoug/20_DPCM/blob/master/platformer4.c

https://github.com/nesdoug/20_DPCM


16. Sound effects

Even if you have no music talent, you might be able to make some cool sound effects. Music is nice, but sound effects make if feel like a real game.

Again, open famitracker. You can use mostly all the fx and any notes. Put all the sound effects in 1 file, each as its own “song”. Add a song in module properties…

18_FT

Try to write the music so pulse channel 1 or triangle play the main melody. And then use pulse channel 2 (or noise channel) for sound effects. That way they don’t collide. If you are having problems with sfx cutting out, you could also try to make the sound effects volume louder than the music (at least a little bit). I actually made my sfx quieter than the music, but louder than the Square 2 channel, where most of the sfx play.

They should be rather short. End every effect with C00, and put the C00 on its own line.

Save. Now, export to NSF file.

19_FT

Open the command prompt and use nsf2data with the -ca65 option. I’m using famitone 2 v1.15. With the nsf file and the nsf2data in the same folder, type CMD in the address bar to open a command prompt, then type…

nsf2data SoundFx.nsf -ca65

and it produced a .s file, which I inlcuded into the project in the crt0.s file, just below the sounds_data label.

And make sure FT_SFX_ENABLE is set at the top, and also that FT_SFX_STREAMS is 1. The init code will initialize our sound effects. Having 1 stream means that only 1 sfx can play at once.

We just need to call the sound effects like…
sfx_play(sfx,channel). Channel means stream, use channel = 0, since we have only 1 activated.

If you want 2-4 streams defined, you could set a channel to 1,2,3. Higher having higher priority. I would caution against having too many, they might conflict. I have used 2 before.

I made it so that jump calls sfx_play(SFX_JUMP, 0). B button plays a noise sfx, and Select button plays a “ding” sfx. I’m going to use that for coin collecting, later.

Start still changes the song.

https://github.com/nesdoug/19_SFX/blob/master/platformer3.c

https://github.com/nesdoug/19_SFX

15. Music

I wrote a page a while back about the NES Audio.

14. Intro to Sound

But, mostly you shouldn’t have to know that much about the sound registers. We are going to use Famitracker to write the music and Famitone 2 v1.15 to play the music. I have been including the famitone code in every example, so that it’s already in place for you. All you have to do is to include the music data file in crt0.s right below music_data:

I’m not the best famitracker musician, so maybe you should watch a tutorial about using it, like this one.

I like this tool chain, but famitone2 has some limitations.

  1. No volume column.
  2. Allowed notes are C-1..D-6, Note Cut
  3. Only Volume, Arpeggio, and Pitch sequences
  4. All instruments should have a volume envelope assigned
  5. no Duty sequence
  6. 64 instruments max
  7. no fx except Tempo Fxx, Looping backwards Bxx, and ending the frame early D00
  8. Up to 17 sub songs in a file

Because there is no volume column, you might want to make a few instruments of different max volume.

And a warning, don’t set ROWS = 256. The text2data program won’t work right.

Put every song into the same file, use “module properties” to add a song.

18_FT

Once everything is done, export a txt file. You need to process this file with famitone2 program text2data.exe. Use the command line, and add the -ca65 switch. I put text2data and the txt file in the same folder, then typed CMD in the address bar, and a command prompt opens. Then I typed

text2data TestMusic3.txt -ca65

and it produced a .s file. This file is then included to the project inside the crt0.s file, right below the music_data label. Our startup code automatically sets a pointer to this file for us.

18_FT2

I wrote 2 songs and imported them into the platformer game.

music_play(0) plays the first song.

music_play(1) plays the second song.

Press “start” to switch between the songs.

The neslib code automatically updates the audio registers to match the song. At the end of the nmi code, FamiToneUpdate is called, once per frame.

If you need to, you can pause the song music_pause(1) and unpause the song music_pause(0). And you can stop the song altogether music_stop().

Oh, and one more side note. I wrote a function that allows you to change the speed of the music with your code. Normally, you could only set the speed inside the famitracker file. But, what if you wanted to speed it up for a boss fight, or slow it down if you are in some stunned state? Well, now you can easily do that with this function…

set_music_speed()

Lower numbers mean faster, bigger means slower. 6 is the default.

https://github.com/nesdoug/18_Music

.

.

On a side note, there are other music drivers.

Pently, has been used in a few games, and might be good for you if you like to write your music with a sheet music tool. It uses a descriptive language. Music Macro Language (MML) or LilyPond can be used.

https://github.com/pinobatch/pently

.

ggsound is another options. NESmaker is using it. I am not familiar enough to give details.

https://github.com/gradualgames/ggsound

.

The full famitracker driver is another option, but it’s very large, and a bit slower than other drivers. You can get it from shiru’s example file.

https://shiru.untergrund.net/files/src/cc65_neslib_famitracker.zip

Or you could look at cppchriscpp’s example code, which uses it, I think (?).

https://github.com/cppchriscpp/nes-starter-kit/tree/master/source/neslib_asm/ft_drv

.

I also wrote some unofficial updates to famitone. They add a volume column, all notes, and some of the famitracker effects.

https://github.com/nesdoug/famitone3.3

https://github.com/nesdoug/famitone5.0

.

14. Platformer

Believe it or not, this is basically the same as the scrolling right code. What makes a platform game different? Gravity. And we need a 16 bit X and Y speed and position. The lower byte represents sub pixel positions. I believe it’s called fixed point math. (I even splurged, and used a signed int or 2, gasp!).

Anyway, for gravity, we add a little to the Y speed every frame. Not too fast, or we might fall right through a floor. So we have a max allowable speed.

And moving left and right I’m slowly accelerating, up to a maximum speed. These define statements in the .h file control all this physics. It should be easy to fine tune now. These are 16 bit values, where the low byte is sub-pixel. So the max speed is really 2.25.

#define ACCEL 30
#define DECEL 50
#define GRAVITY 0x4c
#define MAX_SPEED 0x240
#define JUMP_VEL -0x600
#define MAX_RIGHT 0x9000

And I didn’t want all the platforms to act like solid brick walls. I wanted to be able to jump upward into the platform, but it would catch your feet. So, I added a collision array, which defines how each metatile behaves.

#define COL_DOWN 0x80
#define COL_ALL 0x40

const unsigned char is_solid[]={
0,
COL_DOWN,
COL_ALL+COL_DOWN,
COL_DOWN,
COL_DOWN,
COL_DOWN,
0,
0,
0,
0,
0,
0
};

I had to hand edit these, which is a bit awkward. Each byte is a metatile, and how it will collide.

The BG collision code parses the collision bits, and sends a collision signal, depending on the direction. The main movement code ignores the feet collision if Y speed is negative (rising)

if(BoxGuy1.vel_y > 0) {
BoxGuy1.vel_y = 0;
}

And only sets feet collisions if the feet are just barely inside the block.

if((temp3 & 0x0f) > 3) return 0;

This is why it’s important that Y speed down can’t exceed 3 pixels per frame. Any faster, and you might miss the floor hit.

So I made some new blocks in NES Screen Tool, and screenshot to GIMP, save as metatiles.png, import that as a tileset to Tiled. Make some rooms. Export to .csv. Convert to C array. Import to the C code. (easy, right?)

17_Tiled

Now it’s starting to feel like a real game.

17_platformer

https://github.com/nesdoug/17_Platformer