Writing a full screen with an RLE compressed file.
Reduce the size of the image to 256×240 or maybe 128×128, and then change the mode to 4 color indexed.
From there, you can cut and paste into YY-CHR.
I think you get slightly better results first converting to grayscale, then to mode/indexed (4 colors).
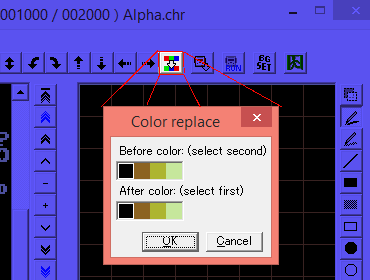
Sometimes (frequently) YY-CHR would get the index in the wrong order and you would have to use the color replace tool to get it correct. Then save as .chr, which you can open in NESST.
BUT — I decided to make my own graphics conversion tool, called NESIFIER. It can convert an image (.png .jpg .bmp or .gif) to NES format — nametable, .chr graphics, and palette. You can now (with version 2.2) export as an 8-bit indexed BMP, which is the format the NES Screen Tool uses to import a file. This could be useful if you have too many unique tiles (use the lossy import option).
https://github.com/nesdoug/NESIFIER
Originally, I made a 256×240 image. But, I had too many unique tiles… So, in GIMP I resized the image smaller (about 160×160), but then padded the canvas size to 256×240.

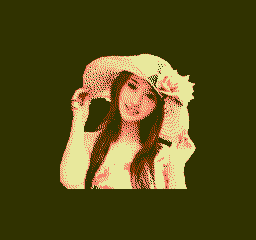
I saved as .png. Open that in NESIFIER, manually selected 4 colors, and dither settings (Floyd-Steinberg, 10) and press “convert”. This is the result.

Notice that the number to the left of “Tiles” is 254. Good. We need it 255 or less. Then I save the tiles “save final CHR”, and save the tilemap “save nametable”, and save the palette “Palette/Save NES 16 bytes”.
You might have to play with the dither settings or dither pattern to get better results. Note that higher dither value looks better, but tends to create more unique tiles.
Open NES Screen Tool and load all these files.
With NES Screen Tool I saved the tilemap , “Nametable/Save Nametable and Attributes/RLE packed as C header .h”. Now we can import it into the C code, with #include “NES_ST/Girl5.h”.
A full nametable is 1024 bytes. You don’t want to leave nametables uncompressed… you would very quickly run out of space. The RLE version is compressed to 339 bytes. The game code needs to decompress this Girl5.h file.
We can’t do this with the screen on, so turn it off, then set a starting address, and call the rle function.
ppu_off();
vram_adr(NAMETABLE_A); // set the destination address, the top left of the screen
vram_unrle(Girl5); // decompress our rle file, copy to the screen. Girl5 is the name of the char array in the Girl5.h file.
ppu_on_all();
So far, I’ve forgotten to mention the palette. NES Screen Tool can copy the palette to the clipboard, which I pasted into the C code an an array of chars. pal_bg() sets the palette for the Background. The palette itself is just a byte array of 16 bytes. We pass the name of the array to pal_bg(palette_name) to copy it to the NES palette.
https://github.com/nesdoug/04_FullBG/blob/master/fullBG.c
https://github.com/nesdoug/04_FullBG
.
.
Fade In / Fade Out
neslib makes it easy to change the brightness of the screen. You can do this with pal_bright(), using a value between 0 (black) and 8 (white). 4 = normal.
I borrowed a function from Shiru’s “Chase” game, and it’s very easy to use.
pal_fade_to(0,4); // fade from black to normal
pal_fade_to(4,0); // fade from normal to black
And if you run the fade.nes file, you see that it fades in and out in an infinite loop. Fading could be used for transitions, like from the title to the game, or from level to level.
https://github.com/nesdoug/05_Fade/blob/master/fade.c
https://github.com/nesdoug/05_Fade
.
Side Note –
With the NESIFIER tool, you can also save tiles and tilemap as a DZ4 file, which is a compression format that I came up with. I haven’t integrated that into the neslib / nesdoug code yet, so you can just skip it and use the RLE format that came with neslib originally. But, DZ4 would work similarly. It can sometimes get better compression than the RLE format.
There are lots of compression tools out there. NES Screen Tool RLE is good enough for now.
